This is quite a frecvent question: How do I know what domain controller logged me in?
1. Go to start / run / cmd
2. Type:
a. set logonserver

b. echo %logonserver%
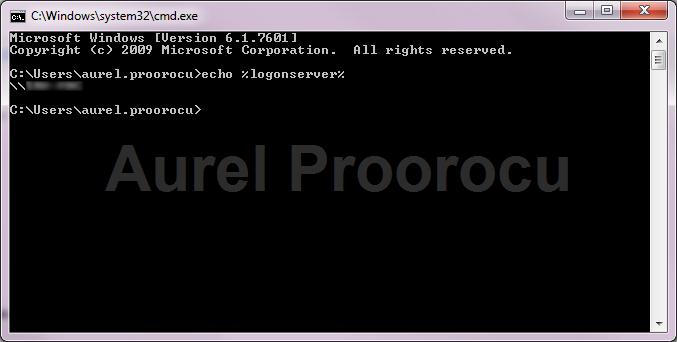
ENJOY.
And if you encounter any problems feel free to comment / contact me.
This is quite a frecvent question: How do I know what domain controller logged me in?
1. Go to start / run / cmd
2. Type:
a. set logonserver
b. echo %logonserver%
ENJOY.
And if you encounter any problems feel free to comment / contact me.
Error 691: Access denied because username and/or password is invalid on the domain.
Solution:
A. Verify the logon ID and password are correct.
B. Make sure the Include Windows logon domain check box is unchecked in the Options tab of the dial-up connection’s Properties dialog box.
C. Make sure the dial-up connection’s security option is correctly configured to use the Require secured password setting.
D. Delete all of the *.pwl files and reboot if you are using win9x.
E. Try another logon ID or create a new Logon ID because the profile may be damaged.
ENJOY.
And if you encounter any problems feel free to comment / contact me.
Problem: WordPress admin pages get a “500 Internal Server Error”
Why? PHP is running out of memory.
Solution: If you are running your own root, dedicated or virtual server this is an easy bugfix: You just have to change the php.ini of your server and provide more memory to your PHP installation. On a shared hosting server – like 1and1 you don’t have access to that central php.ini. But there is an easy workaround:
Create a text file and name it “php.ini” (without the quotes ) and with a single line of code in it:
memory=20M
This file has to be placed into the directory /wp-admin/ within your WordPress installation.
Enjoy !
A very usual problem that helpdesk and administrators occur is:
“Help me, i don`t receive e-mails from X”
When the IT guy checks the station he see that the junk folder is full of e-mails.
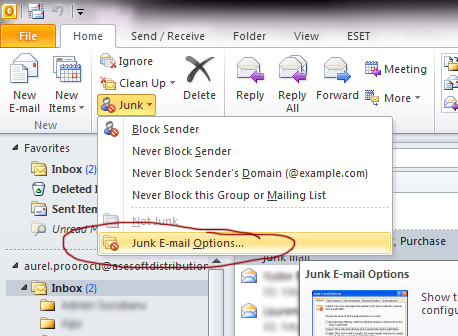
So, to disable the junk folder do:
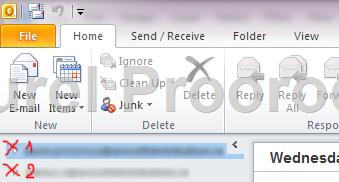
1. Open Outlook 2010 / Go to Home tab / Junk / Junk E-mail Options:
2. In the Junk E-mail Options window, go to Options tab, and select “No Automatic Filtering…”:
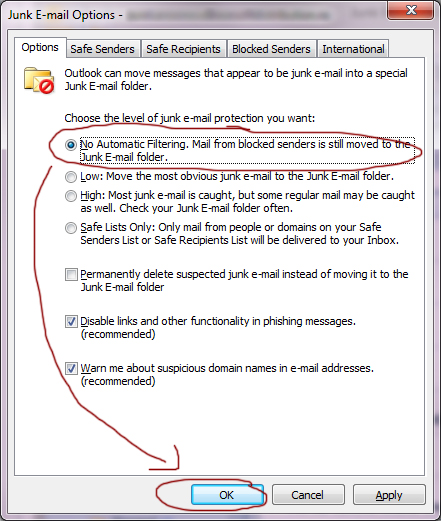
ENJOY.
And if you encounter any problems feel free to comment / contact me.
This a very usual problem when migrating from Outlook 2007 to 2010.
Before we start you have to know that outlook 2010 does not use the NK2 file anymore. It stores the list as a hidden file in the inbox and creates ‘suggested contacts’ for everyone you send mail to
A. Method 1
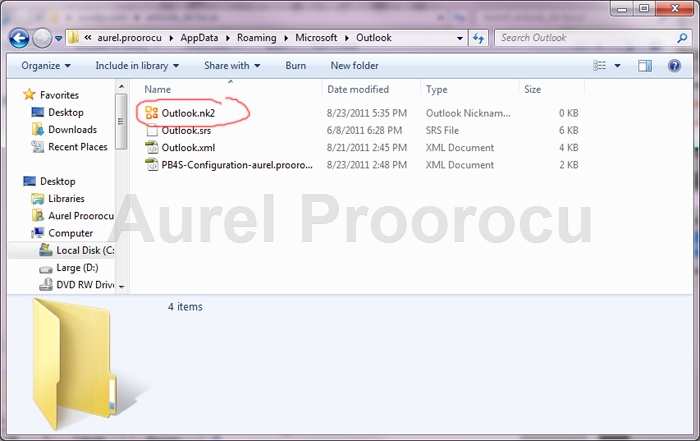
1. Copy your nk2 file to the folder: %appdata%\Microsoft\Outlook
*Your nk2 file should have the same name of your outlook profile, by default it is: “Outlook“. If you already know what your profile name is, go directly to step 6 !
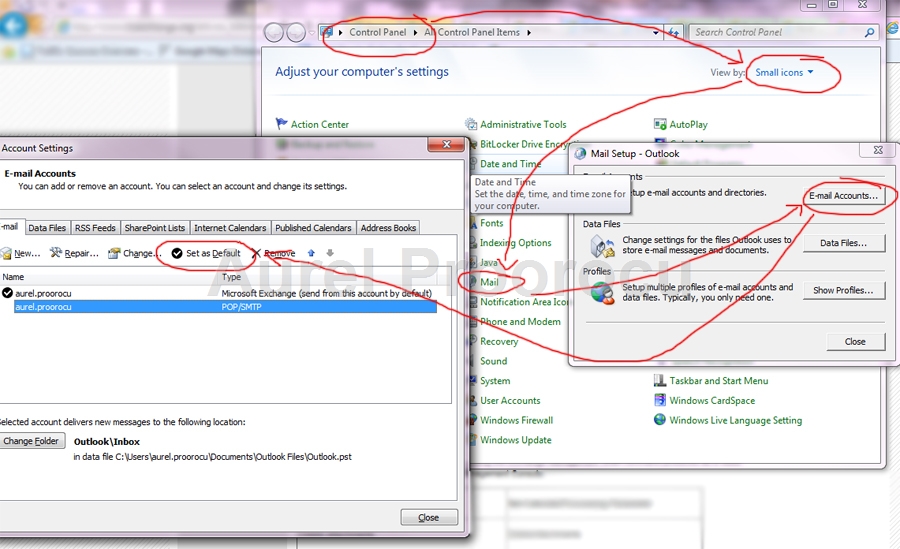
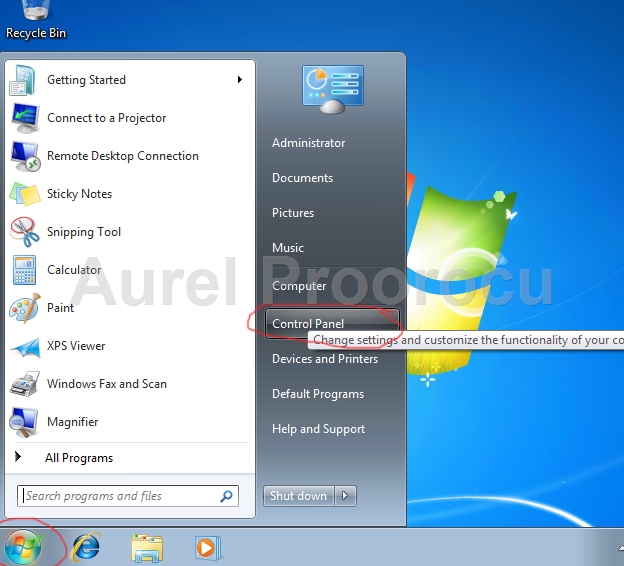
2. To find out what your Outlook profile name is, go to Start / Control Panel :
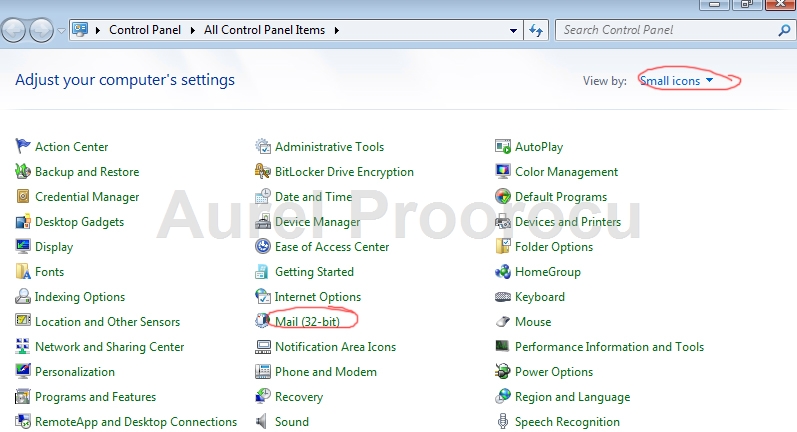
3. Then select Small Icons from the up/right menu and click on Mail:
4. Now select Show Profiles:
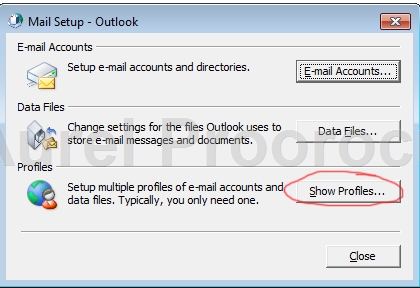
5. And here you have the name of your Outlook account, in our case ( the default name ) Outlook:

6. Then go to Start / run and type this command and click OK:
outlook.exe /importnk2

After you made the import of the .nk2 file, the contents of the file are merged into the existing nickname cache that is stored in your mailbox.
B. Method 2
Download the Microsoft Fix IT 50584 from here: http://go.microsoft.com/?linkid=9758283
Notes
ENJOY.
And if you encounter any problems feel free to comment / contact me.
An usual error in Outlook 2010 / 2007 / 2003 / XP that appears when you try to save an attachment is: ‘Cannot save the attachment. Cannot create file . Right-click the folder you want to create the file in, and then click Proprieties on the shortcut menu to check your permissions for the folder‘.
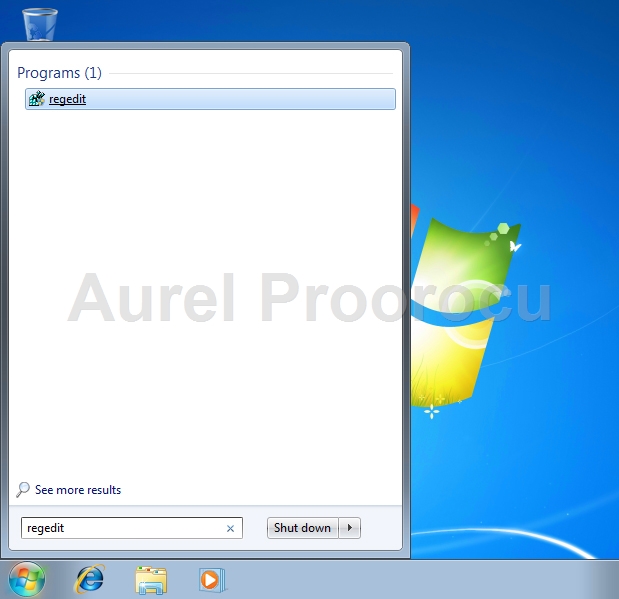
1. Go to Start / regedit and press ENTER:
2. Now browse to: HKEY_CURRENT_USER\Software\Microsoft\Office\<version*>\Outlook\Security
*replace <version> with: 14.0 ( if you have Outlook 2010 ) / 12.0 ( Outlook 2007 ) / 11.0 ( Outlook 2003 ) / 10.0 ( Outlook XP )
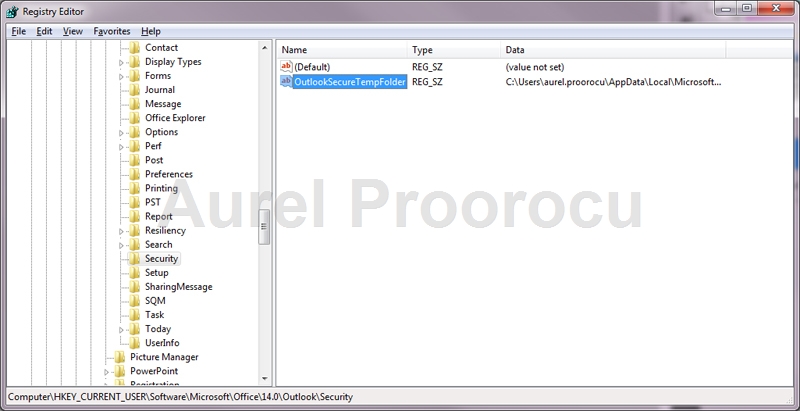
3. Double click on OutlookSecureTempFolder, and the pop up with the Edit String will appear. Here you replace Value data with the new location of the folder ( EX: D:\HereIwantMyAttachments )

4. Close and reopen Outlook, and now you should be able to save the attachments in the mail.
ENJOY.
And if you encounter any problems feel free to comment / contact me.
This is a quite common error on Outlook 2010 x64.
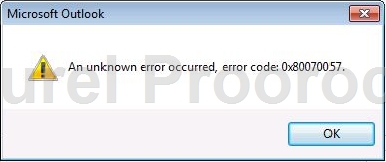
Error Code: An unknown error occurred, error code: 0×80070057
Symptom: It occurs when you try to add a new Exchange account in Outlook 2010
And in most cases because you try to use the AutoAccountSetup to create the new account
Solution:
1. Manualy create the Outlook 2010 Profile using this tutorial.
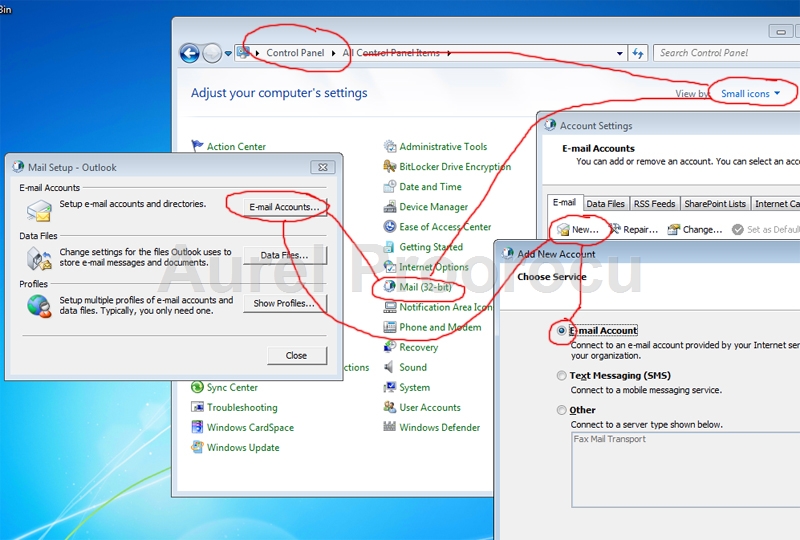
a. Go to Control Panel / Select Small Icons from the right menu / Click on MAIL / E-mail Accounts / New / E-mail Account:
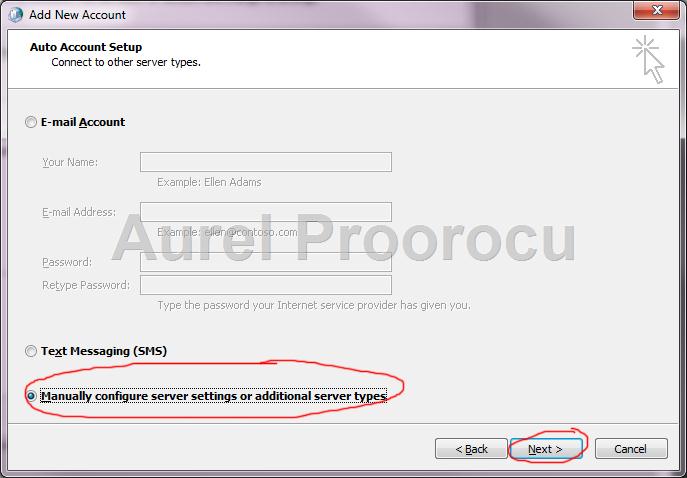
b. Select Manually configure server settings or additional server types, then click NEXT:

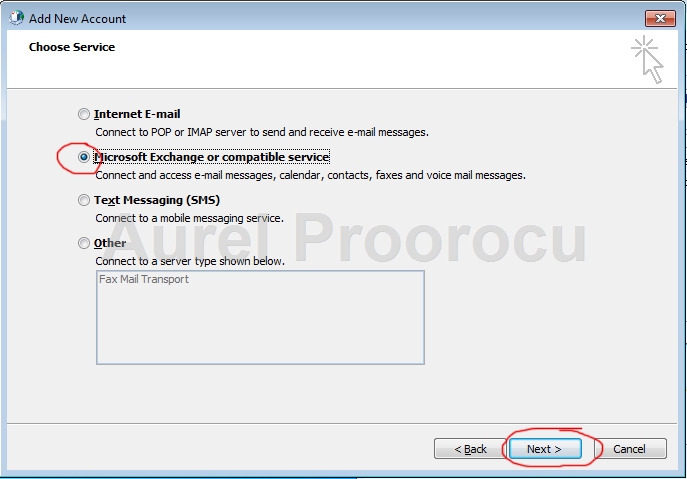
c. Select Microsoft Exchange or compatible service, then click NEXT:
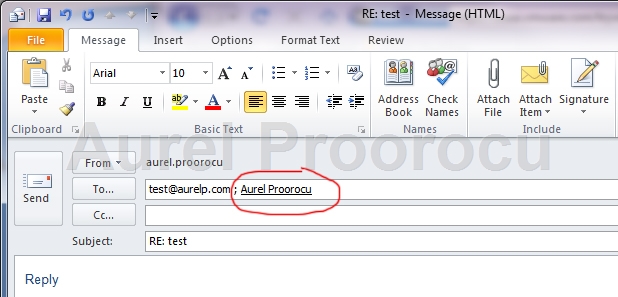
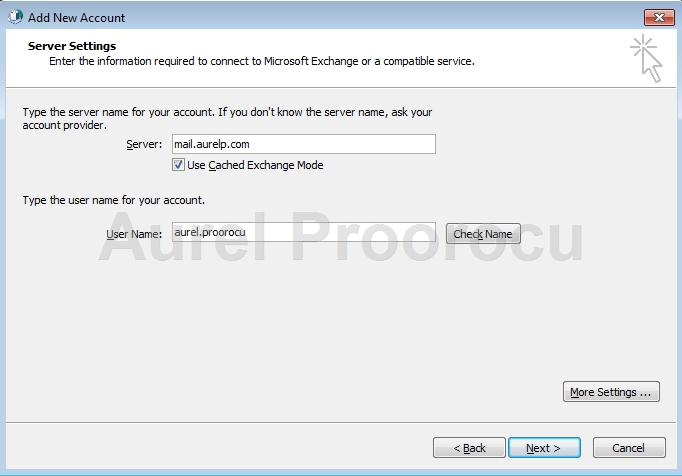
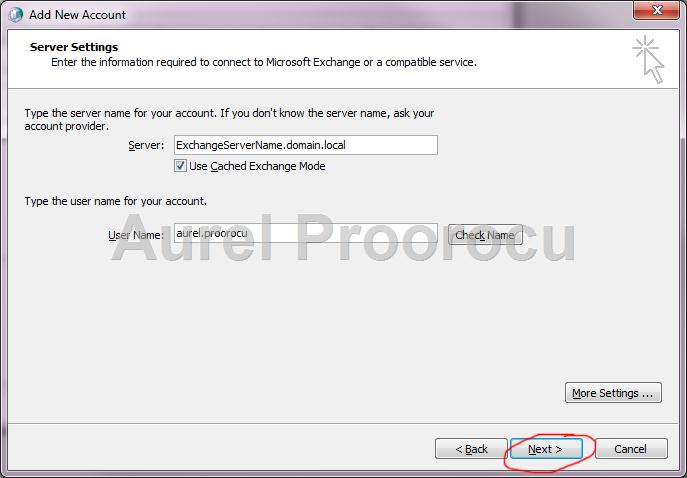
d. Complete the next step with your exchange server and user name, then click on Check Name, andNEXT:
e. Click FINISH and enjoy your new account.
2. Install the hotfix for this error:
2281463 Description of the Outlook 2010 hotfix package (outlook-x-none.msp): August 31, 2010
http://support.microsoft.com/default.aspx?scid=kb;en-US;2281463
More information from Microsoft:
When you create an Outlook profile by using the Auto Account Setup process, a Lightweight Directory Access Protocol (LDAP) query is first performed to look up the user who is currently logged on. Then, this user’s e-mail address and Exchange server information is returned from Active Directory Domain Services. This LDAP query is successful in Outlook 2010, and the query is not the cause of the error message that is mentioned in the “Symptoms” section.
When you click Next in the Auto Account Setup process to connect with your server and finish creating the profile, Outlook 2010 has some new additional code (This code is not found in Outlook 2007) to make sure that you do not add the same Exchange account two times. This new code assumes that Autodiscover succeeds. And, it pessimistically assumes that if Autodiscover fails, you might be trying to add a duplicate Exchange account. Because Autodiscover is expected to fail in almost all configurations that involve an Exchange 2003 mailbox, this new code generates the 0×80070057 error.
In this scenario, you can force a successful Autodiscover connection by using a local Autodiscover.xml file and some registry data. This registry data forces Outlook to use a local Autodiscover.xml file for Autodiscover queries.
The following is an example Autodiscover.xml file:
<Autodiscover xmlns="http://schemas.microsoft.com/exchange/autodiscover/responseschema/2006">
<Response xmlns="http://schemas.microsoft.com/exchange/autodiscover/outlook/responseschema/2006a">
<Account>
<AccountType>email</AccountType>
<Action>settings</Action>
<Protocol>
<Type>EXCH</Type>
<Server>E2K3.wingtiptoys.com</Server>
</Protocol>
</Account>
</Response>
</Autodiscover>
Important This section, method, or task contains steps that tell you how to modify the registry. However, serious problems might occur if you modify the registry incorrectly. Therefore, make sure that you follow these steps carefully. For added protection, back up the registry before you modify it. Then, you can restore the registry if a problem occurs. For more information about how to back up and restore the registry, click the following article number to view the article in the Microsoft Knowledge Base:
322756 How to back up and restore the registry in Windows
To use this workaround, follow these steps:
Key: HKEY_CURRENT_USER\Software\Microsoft\Office\14.0\Outlook\AutoDiscover
DWORD: PreferLocalXML
Value: 1
String: the name of your domain
Value: thepath of the Autodiscover.xml file that includes the file name
ENJOY.
And if you encounter any problems feel free to comment / contact me.
This is a very usual problem that helpdesk people face, that has a very simple solution.
In Outlook 2010 we can finally add multiple Exchange accounts, and use all the features they offer ( in previous versions Outlook Mail Profile could handle multiple classic email accounts (POP3, etc) but only oneExchange account.
1. Close Outlook 2010 ( else you will get this error ):

2. Go to Start / Control Panel, here select Small Icons ( from the right-up corner menu ), and then click on Mail:

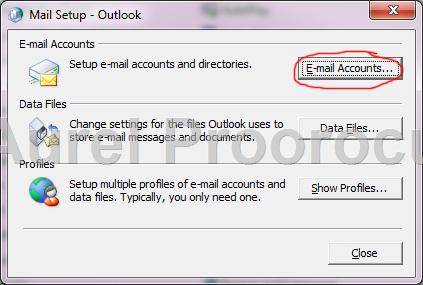
3. A new window will appear. Here click on E-mail Accounts:
4. In the new window, select the E-mail tab, then click on New:

5. In the new window select E-mail Account, then click Next:

6. At the next step, select Manually configure server settings or additional server types, and click Next:
7. At the next step you have to provide the settings for your Exchange Server, and the account that you want to configure, and then click Next, and after that Finish.
8. After you made all this steps you have the second Exchange Account configured in Outlook:
Enjoy !
If you encounter any problems feel free to comment / contact me
A very nice free tool from U-B Tech, to calculate the cost of implementing Exchange 2010 vs 2003 / 2007:
The Exchange 2010 ROI tool showcases the financial benefits of implementing an Exchange 2010 messaging infrastructure in the organization.
One of Exchange 2010’s biggest advantages is using SATA based storage as its most optimized storage medium. This capability along with a 2-Node -cluster and better redundancy features make Exchange 2010 the most optimized, scaled and cost effective messaging solution.
Use U-BTech’s Exchange 2010 ROI tool to compare the costs of implementing Exchange 2003, 2007 and 2010 and try different cost variations including storage costs, hardware costs, licensing costs including Microsoft Cloud and more. Start comparing and make your choice today !
Download here: http://www.u-btech.com/downloads/exchange-2010-roi-tool.zipEnjoy !